Freeze-Drying Fruit at Home: Best Picks and How-To Tip
I was skeptical about freeze drying fruit until I tried a piece of freeze-dried strawberry that tasted exactly like fresh strawberry but with an incredible concentrated flavor and satisfying crunch. That's when I realized freeze drying isn't just another food preservation method - it's a completely different approach that preserves texture, nutrition, and flavor in ways that traditional dehydrating simply can't match.
Freeze drying uses cold temperatures and vacuum pressure to gently remove water from food while preserving its cellular structure, shape, and nutritional value. The result is light, crisp fruit that stores for decades without refrigeration and rehydrates beautifully when added to recipes. Unlike heat dehydration which can destroy vitamins and create chewy textures, freeze drying maintains the fruit's original characteristics while creating a shelf-stable product.
Is This Project For Me?
If you want long-term food storage that maintains maximum nutrition and flavor, freeze drying is worth considering for you. You're looking for preservation methods that go beyond basic pantry storage to create emergency food supplies or convenient ingredients that last for years. This works whether you're preserving garden surplus, bulk purchases, or creating lightweight camping foods. You'll need access to a freeze dryer, which is a significant equipment investment, but the results justify the cost for serious food preservation. If you love the idea of having high-quality preserved fruit that tastes nearly fresh after years of storage, this method belongs in your preservation toolkit. Make sure to check out of free printable Food Preservation Quick Guide below.
Get The Guide
Stop second-guessing every step of your food preservation projects. This guide walks you through method selection, safety basics, and how to fix things when they don't go according to plan so you can preserve with confidence instead of crossed fingers.
Disclosure
Some links on FiberMaiden are affiliate links. When you click and purchase, I may earn a small commission at no extra cost to you. I partner only with brands and tools I trust and use in my own kitchen, studio, and garden. Your support means a lot.
About The Freeze Drier
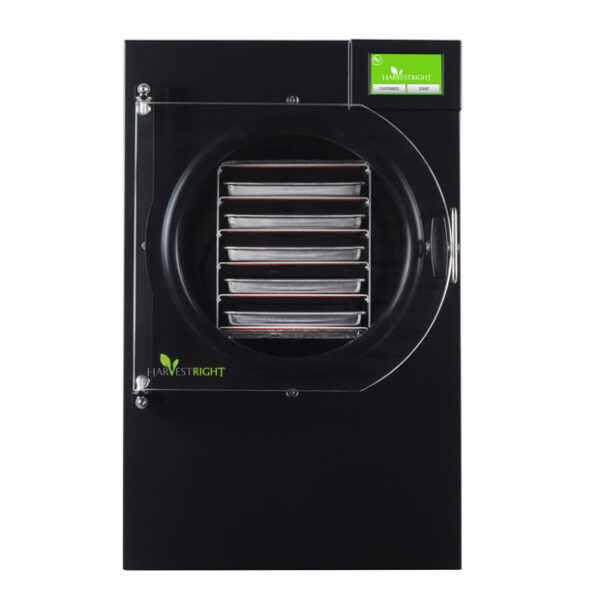
After months of research and comparing models, I invested in the Medium Harvest Right freeze dryer. For our family kitchen, it's been the perfect balance of capacity and counter space. It's handled everything from delicate berries to hearty garden vegetables beautifully. If you're considering taking the plunge into freeze drying, [this is the exact model I use]. I've put together some thoughts on what to consider before buying, since it's definitely an investment worth researching thoroughly.
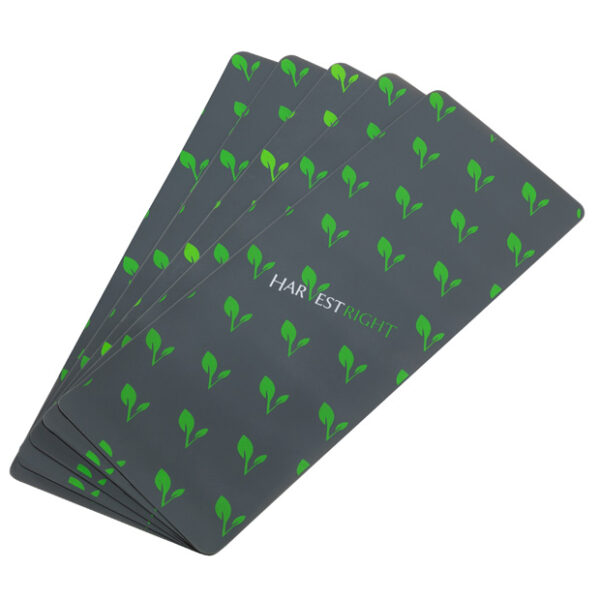
Before you buy, here's what I wish I'd known: First, these units are loud during the freeze phase, so consider placement away from living spaces. Second, the initial investment is significant, but it pays off if you regularly preserve large quantities of food. Third, you'll want to factor in the cost of mylar bags and oxygen absorbers for long-term storage. And finally, plan for a learning curve with different foods - what works for strawberries doesn't always work for tomatoes.
Get 3 Free Recipe Sheets
Ready for recipes that don't require a culinary degree to follow? Get seasonal recipe sheets designed for real kitchens and busy lives, the kind that work even when your kids are asking for snacks mid-prep.
Troubleshooting and Safety
Fruit not drying completely: Pieces may be too thick, or the cycle ended before moisture was fully removed. Cut fruit into smaller, more uniform pieces and consider extending the drying time. Check that your freeze dryer is maintaining proper vacuum and temperature.
Fruit turning brown during processing: Some fruits oxidize even during freeze drying. Pre-treat with ascorbic acid solution or lemon juice before processing. Vacuum packaging immediately after drying also helps prevent continued oxidation.
Texture coming out wrong: Overripe fruit may not freeze dry well, becoming mushy instead of crisp. Use fruit at peak ripeness but not beyond. Very watery fruits like watermelon may never achieve the desired crispy texture.
Freeze dryer not reaching proper vacuum: This prevents effective moisture removal. Check door seals, vacuum pump oil levels, and ensure all connections are tight. Maintenance issues can significantly impact drying quality.
Fruit rehydrating poorly: Over-processed fruit may not rehydrate to original texture. Monitor cycles carefully and don't exceed recommended processing times. Some texture change is normal, but fruit should still be recognizable when rehydrated.
Storage containers allowing moisture back in: Even small amounts of moisture can ruin freeze-dried products. Use proper moisture-barrier containers with oxygen absorbers, and ensure fruit is completely cool before sealing.
Frequently Asked Questions
How long does freeze-dried fruit actually last?
Is freeze drying worth the equipment cost?
Which fruits work best for freeze drying?
How does freeze-dried fruit compare nutritionally to fresh?
Can I freeze dry fruit without a machine?
How much space does a freeze dryer require?
Food Preservation Quick Guide
One page for methods, quick ratios, safety basics, altitude tips, and storage. For education only—use tested recipes from reliable sources.
• Water bath canning is for high-acid foods (pH ≤ 4.6) or foods acidified per a tested recipe.
• Low-acid foods (most vegetables, meats, soups) require pressure canning—never water bath.
• Use 5% acidity vinegar for pickling. Keep foods fully submerged. Follow headspace exactly.
• Adjust for altitude. Use jars/lids in good condition. When in doubt—don’t risk it.
Methods at a glance
| Method | Best for | Key rule | Core target / ratio |
|---|---|---|---|
| Freezing | Fruit, veg, stocks, breads | Freeze at 0°F/−18°C. Label & rotate. | Blanch most veg before freezing to lock color/texture. |
| Dehydrating | Fruit, veg, herbs | Dry until leathery or brittle (not tacky). | Store airtight with desiccant; keep cool & dark. |
| Water Bath Canning | Jams, jellies, fruit, pickles, tomatoes (acidified) | Use tested times; keep jars submerged; vent air bubbles. | Typical headspace: jams ¼″; fruit/pickles ½″. |
| Pressure Canning | Low-acid veg, beans, meats, broths | Use correct pressure for altitude; follow tested times. | Headspace usually 1–1¼″ (see recipe). |
| Fermentation | Cabbage, carrots, peppers, etc. | Keep veg fully submerged; use clean tools. | 2–3% brine by weight (see quick ratios). |
| Pickling | Cucumbers, onions, beets, mixed veg | Use 5% vinegar; don’t dilute below tested ratios. | Common hot pack: ≥1:1 vinegar:water + salt/sugar/spices. |
| Jam/Jelly | High-acid fruits | Boil to gel stage; fill hot, process in water bath. | Gel temp ≈ local boiling point + sugar effect (see recipe). |
| Freeze-Drying | Fruits, meals, herbs (with home unit) | Dry until pieces are crisp throughout. | Store in mylar/airtight with O₂ absorber; cool & dark. |
Quick ratios & targets
| What | Basic ratio / target | Notes |
|---|---|---|
| Ferment brine | 2% = 20 g salt per 1000 g water • 3% warm kitchens/crunch | 1 quart water ≈ 946 g → ~19 g salt for 2%. |
| Pickling brine (quick) | ≥ 1:1 5% vinegar : water + 1–3 tbsp salt/qt (per recipe) | Do not reduce vinegar below tested ratios. |
| Jam/jelly sugar | Classic: ~1:1 fruit:sugar by weight (varies with pectin) | Follow pectin brand/recipe; do plate or wrinkle test. |
| Headspace (typical) | Jams ¼″ • Fruits/pickles ½″ • Pressure-canned 1–1¼″ | Always use recipe’s specified headspace. |
| Freezer headspace (liquids) | Leave ½–1″ | Liquids expand; use straight-sided containers or bags. |
Altitude adjustments (quick)
• Water bath canning: add time per the tested recipe. Typical add-ons: +5 min (1,001–3,000 ft), +10 min (3,001–6,000 ft), +15 min (6,001–8,000 ft).
• Pressure canning: increase pressure per the tested recipe. Weighted-gauge cookers are often 10 psi at 0–1,000 ft and 15 psi above; dial-gauge cookers typically start ~11 psi and increase with altitude.
Always follow the specific altitude table in your recipe/manual.
Typical blanch times for freezing (quick)
| Vegetable | Time (minutes) | Notes |
|---|---|---|
| Green beans | 3 | Whole or cut |
| Broccoli florets | 3 | Cool fast; drain well |
| Carrots (slices) | 2 | Spears 3 min |
| Peas | 1½–2 | Shell, blanch, chill |
| Kale/spinach | 2 | Press out water |
| Corn (kernels) | 4 | On the cob 4–7 |
Times vary by cut and maturity; check a tested chart for more vegetables.
Storage guide (best quality)
| Method | Best by | Storage notes |
|---|---|---|
| Water bath canned (high-acid) | 12–18 months | Cool, dark, dry; check seals before use. |
| Pressure canned (low-acid) | 12–18 months | Cool, dark, dry; discard if seal fails or food looks/smells off. |
| Ferments (refrigerated) | Several months | Keep submerged; use clean utensil. |
| Dehydrated | 6–12 months | Airtight with desiccant; cool & dark. |
| Frozen | 8–12 months | 0°F/−18°C; label with date. |
| Freeze-dried | Long-term | Mylar/airtight with O₂ absorber; cool & dark. |
Labeling checklist
- Product & method (e.g., “Dill Pickles – Water Bath”)
- Recipe source & year (tested)
- Date processed • Batch/lot
- Headspace/ratio notes (if helpful)
- Altitude/pressure used (for canning)
Your notes
© FiberMaiden • www.fibermaiden.com


