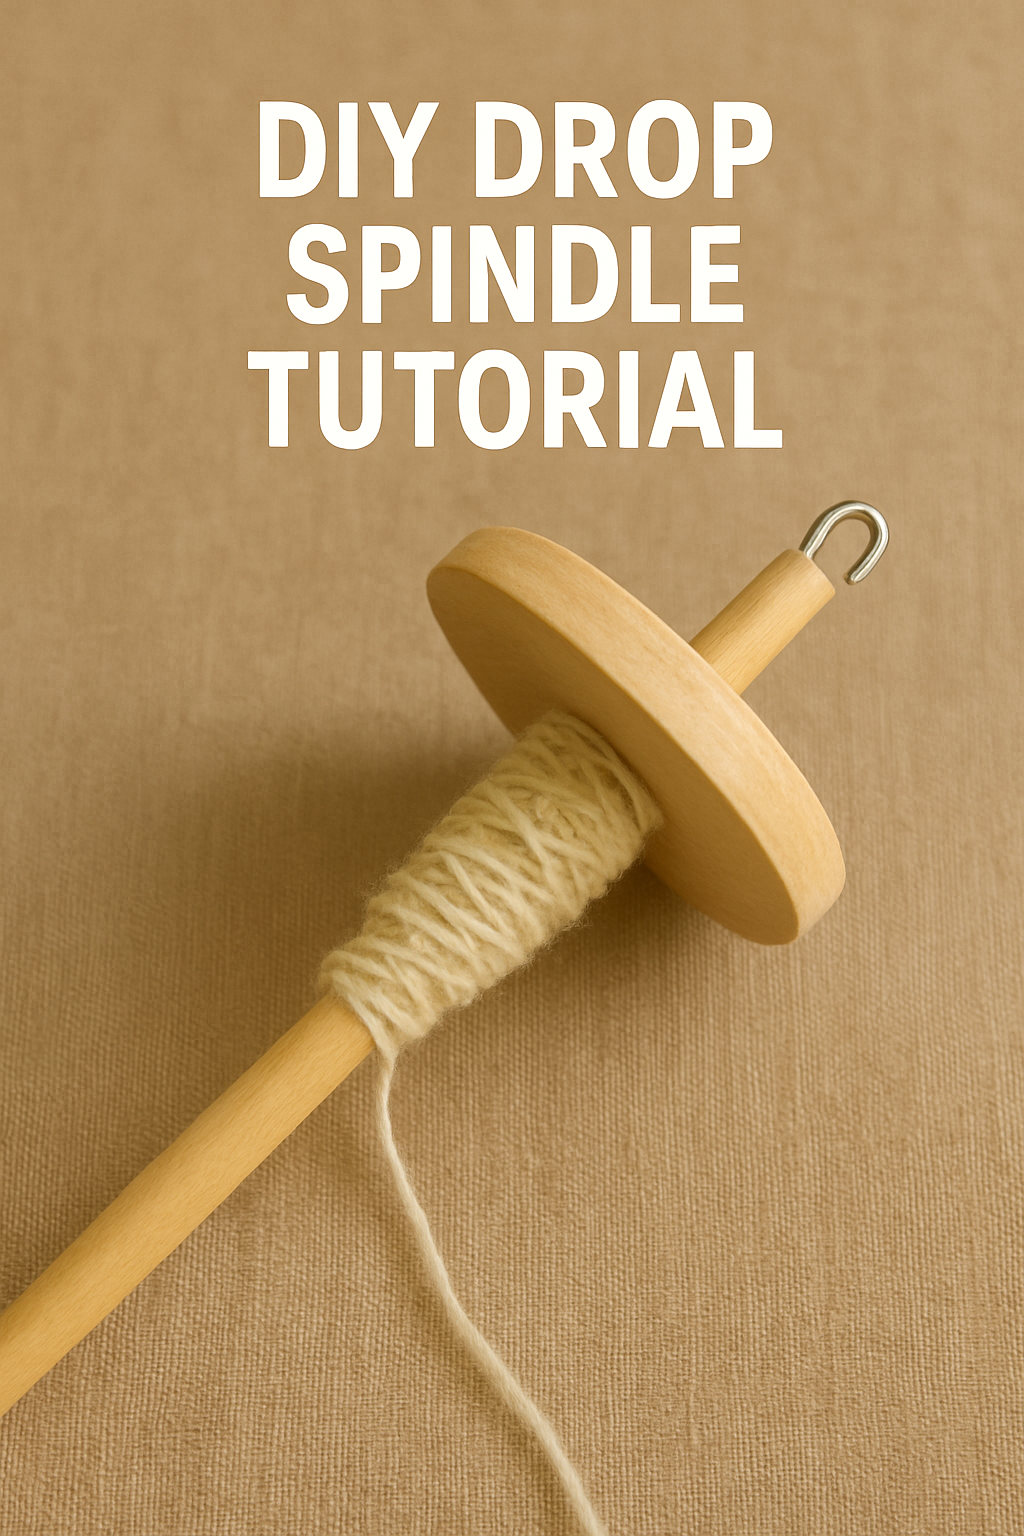
DIY Drop Spindle Spinning Guide
Spinning your first yarn can be simple and calm. A basic drop spindle and a little wool are enough to learn twist, draft, and wind on. You do not need a wheel or a studio. By the end you will know what fiber to start with, which way to spin for S or Z, and how to finish a small skein that is ready to knit.
Is This Project for Me
If you want a quiet, portable craft that teaches the foundations fast, this is it. Park and draft lets you learn in slow motion and still make real yarn. Ten minutes a day adds up. The gear is affordable, the motions are soothing, and every yard you spin feels like a tiny win. If you like practical skills that travel and do not take over the house, you will enjoy this project. Check out the free printable Fiber Arts Quick Guide below.

Start your journey into the fiber arts with the Fiber Starter Bundle, a thoughtfully curated digital guide designed for beginners who want to learn practical, sustainable, and meditative fiber skills. Whether you’re picking up a needle for the first time or returning to the rhythm of handwork, this bundle will guide you through foundational skills, easy patterns, and gentle encouragement rooted in tradition.
What’s Included:
Intro to fiber types and basic supplies
Simple sewing project: Hand-stitched tote bag
Beginner crochet guide: Granny square tutorial
Stitching prompts for mindfulness and creativity
Bonus tips on fiber care and sustainable mending
Create with intention, slow down with your hands, and rediscover the joy of making. Download your bundle and begin your fiber journey today.
Get The Guide
Learn core techniques, tools, and terms for knitting, crochet, weaving, and simple sewing. Clear steps, beginner checklists, and quick wins so you can start today.
Disclosure
Some links on FiberMaiden are affiliate links. When you click and purchase, I may earn a small commission at no extra cost to you. I partner only with brands and tools I trust and use in my own kitchen, studio, and garden. Your support means a lot.


Get 3 Free Recipe Sheets
Exclusive seasonal recipes for email members. High value, low frequency.
Troubleshooting and safety notes
Yarn keeps corkscrewing. That means too much twist for the draft. Park the spindle, pull a little more fiber, then let the stored twist run in. If the strand snaps, add a touch more overlap when you join and keep an even draft. If the spindle drops a lot, spin smaller lengths and stand over a soft surface like a rug or a towel.
Comfort and safety. Keep shoulders down and wrists relaxed. Take short stretch breaks. Check that the hook is snug so the cop does not jump off. Keep long hair and necklaces tucked away. Store the spindle out of reach of pets and small kids.
Frequently Asked Questions
What fiber should I start with
What spindle weight works for beginners
Which way do I spin for S or Z twist
How do I start the yarn on the spindle
How do I join more fiber when I run out
How do I finish the yarn
Can I ply on a spindle
How much yarn fits on a spindle
Fiber Arts Quick Guide
One page for yarn weights, needle & hook sizes, gauge basics, and quilt math. Keep within reach while you work.
Yarn weights at a glance
| Weight | CYC # | Knit gauge (sts/4 in) • Needles US | Crochet gauge (sts/4 in) • Hook |
|---|---|---|---|
| Lace | 0 | 33–40+ • 000–1 | 28–36+ • Steel/B–C |
| Fingering / Sock | 1 | 27–32 • 1–3 | 21–32 • B–E (2.25–3.5 mm) |
| Sport | 2 | 23–26 • 3–5 | 16–20 • E–7 (3.5–4.5 mm) |
| DK | 3 | 21–24 • 5–7 | 12–17 • 7–I (4.5–5.5 mm) |
| Worsted | 4 | 16–20 • 7–9 | 11–14 • I–K (5.5–6.5 mm) |
| Bulky | 5 | 12–15 • 9–11 | 8–11 • K–M/N (6.5–9 mm) |
| Super Bulky | 6 | 6–11 • 11–17 | 5–9 • M/N–Q (9–15 mm) |
| Jumbo | 7 | 1–6 • 17+ | 0–5 • Q+ (15 mm+) |
Always swatch. Fiber content, twist, and your tension change gauge.
Needle and hook conversions
Knitting needles (US ↔ mm)
| US | mm |
|---|---|
| 0 | 2.00 |
| 1 | 2.25 |
| 2 | 2.75 |
| 3 | 3.25 |
| 4 | 3.50 |
| 5 | 3.75 |
| 6 | 4.00 |
| 7 | 4.50 |
| 8 | 5.00 |
| 9 | 5.50 |
| 10 | 6.00 |
| 10.5 | 6.50 |
| 11 | 8.00 |
| 13 | 9.00 |
| 15 | 10.00 |
Crochet hooks (Letter ↔ mm)
| Hook | mm |
|---|---|
| B | 2.25 |
| C | 2.75 |
| D | 3.25 |
| E | 3.50 |
| F | 3.75 |
| G | 4.00 |
| 7 | 4.50 |
| H | 5.00 |
| I | 5.50 |
| J | 6.00 |
| K | 6.50 |
| L | 8.00 |
| M/N | 9.00 |
| N/P | 10.00 |
Gauge and swatch basics
- Knit or crochet a 6 × 6 in swatch. Wash and lay flat to dry.
- Measure the center 4 in square. Count stitches and rows.
- Stitches per inch: stitches in 4 in ÷ 4. Rows per inch: rows in 4 in ÷ 4.
Cast on = target width (in) × stitches per inch + 2 edge stitches.
Rows to length = target length (in) × rows per inch.
Quilt and sewing quick math
- Seam allowances: quilting 1/4 in • garments 5/8 in
- Half-square triangles (HST): cut size = finished size + 7/8 in (or add 1 in and trim to square)
- Quarter-square triangles (QST): cut size = finished size + 1 1/4 in
- Binding estimator: total length = perimeter + 12 in; strip count = ceil(total ÷ WOF). Typical strip width 2.5 in
- Prewash tips: prewash reds/darks. Press, square the grain, then cut.
Labeling and project notes
- Yarn or fabric source, colorway, lot, and fiber content
- Gauge and needle or hook size
- Pattern name and size adjustments
- Wash and care instructions
© FiberMaiden • www.fibermaiden.com