

Up Potting Fall Seedlings
My first attempt at growing fall seedlings ended with a tray of sad, stunted plants that never made it past their original tiny containers. I kept waiting for some magical moment when they'd be "ready" to transplant, not realizing that timing and technique matter more than perfect conditions when it comes to up potting fall seedlings.
Fall seedlings face unique challenges that spring seedlings don't encounter. Shorter days, cooler temperatures, and the approaching winter create a narrow window for successful establishment. Understanding when and how to move your seedlings to larger containers can mean the difference between thriving plants and disappointing failures. Make sure to check out the free printable Gardening Quick Guide below.
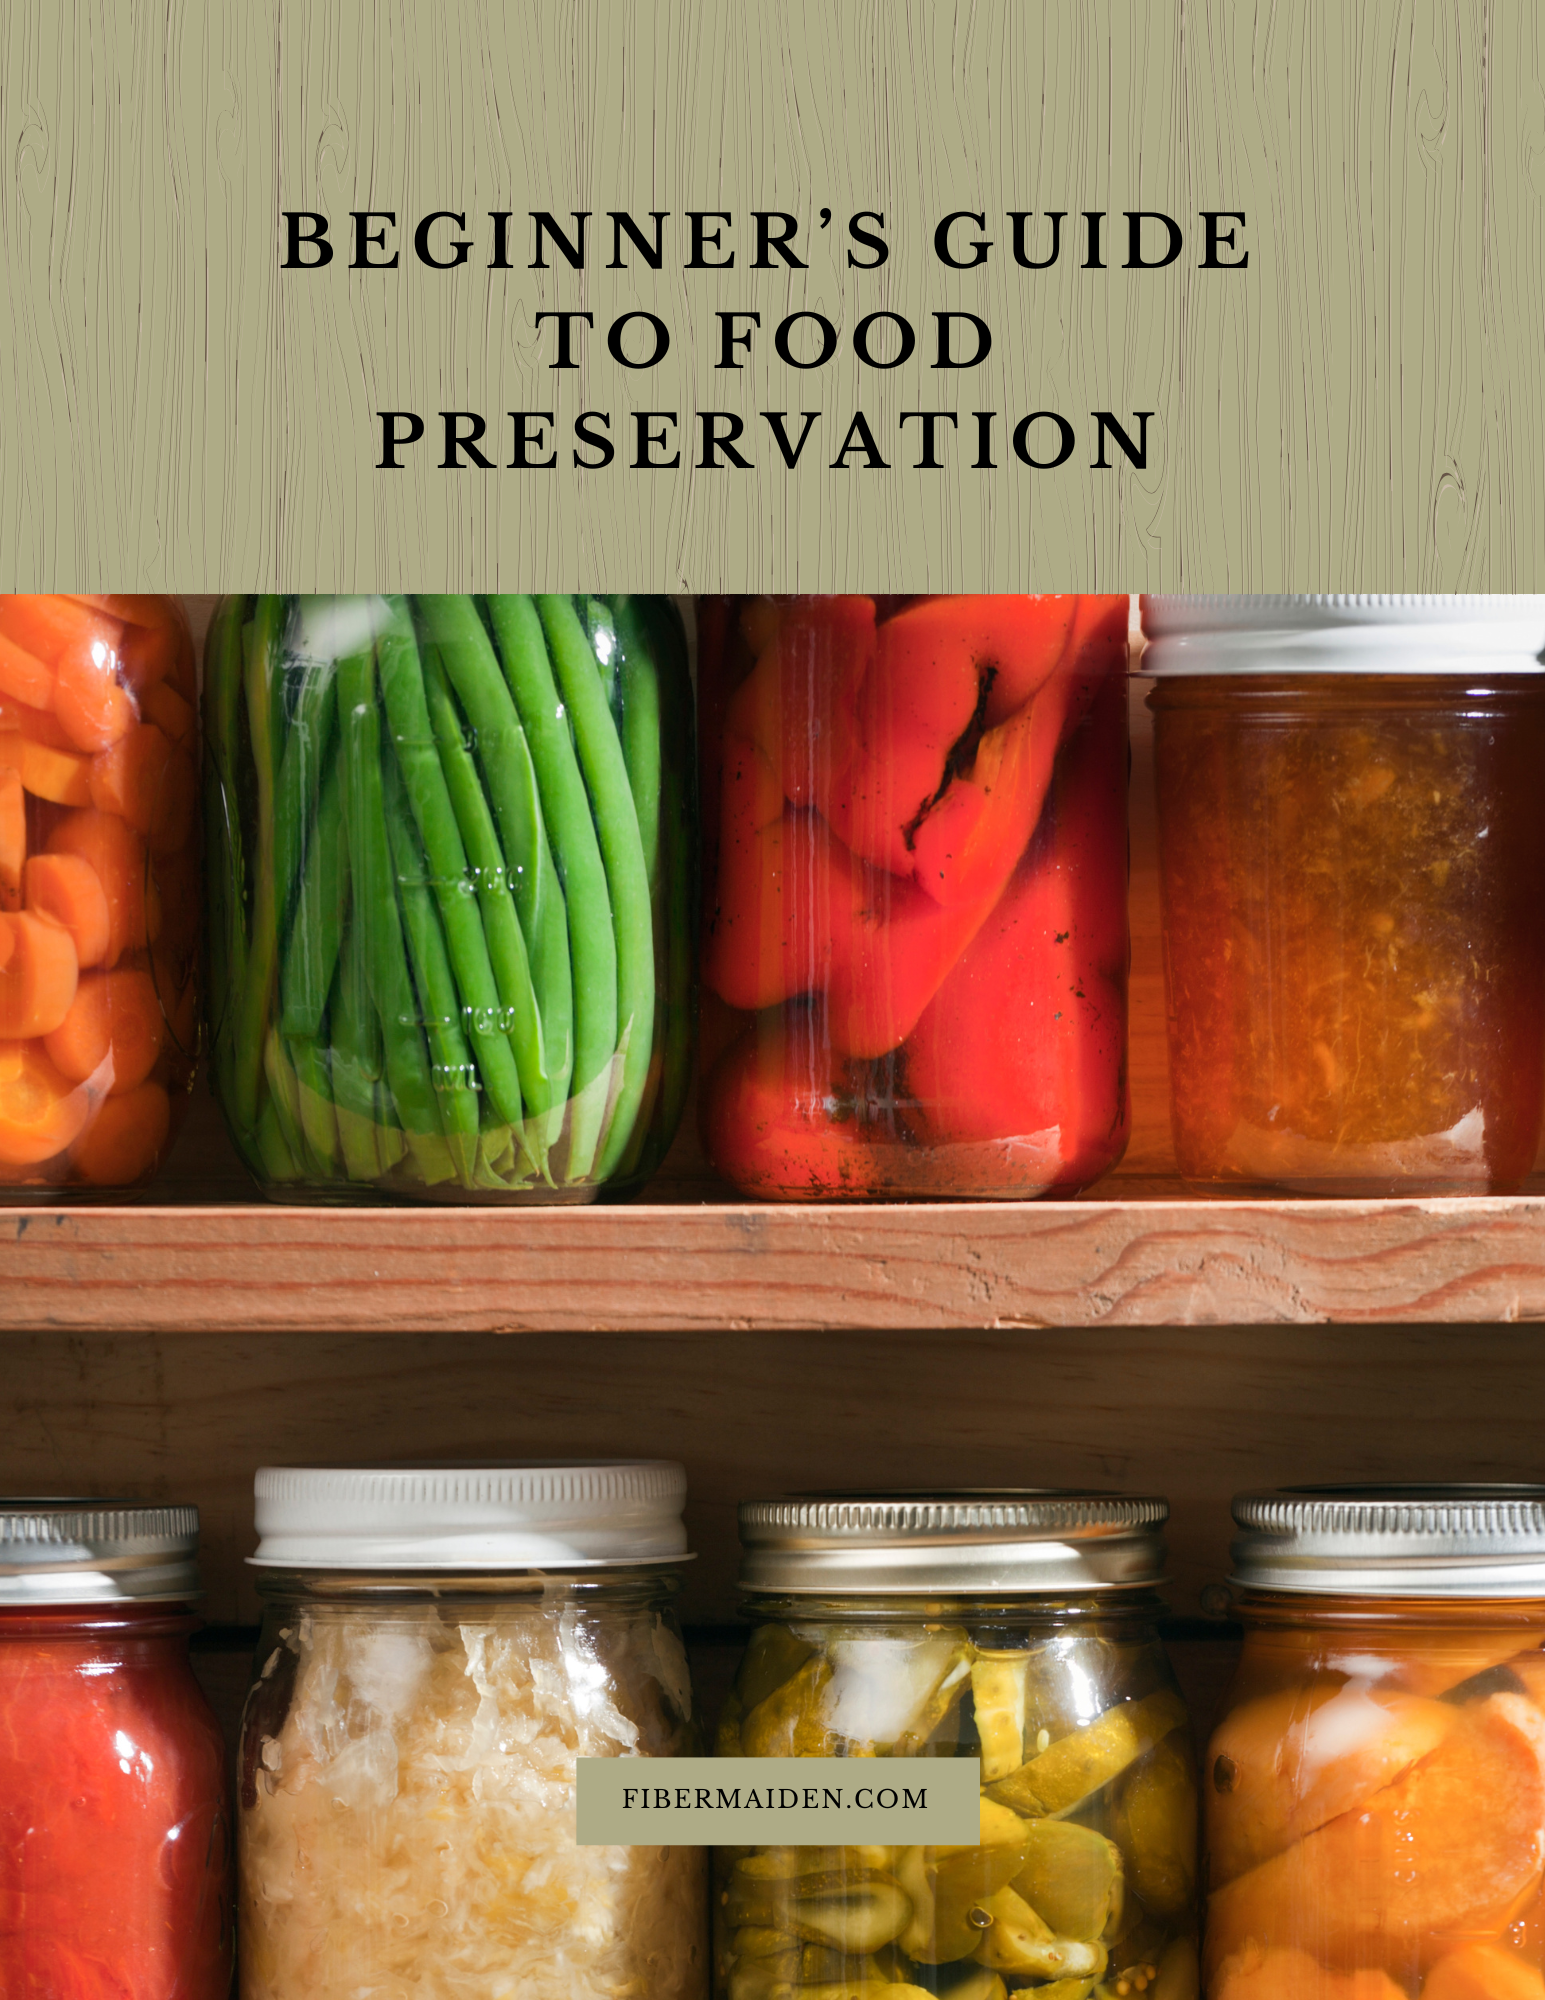
Beginner Guide to Food Preservation
This guide is a simple, approachable introduction to preserving food at home. Whether you’re new to food preservation or returning to it after a break, this resource covers the essentials in a way that’s easy to follow and rooted in practical experience.
It’s written to help you make real progress using tools and ingredients you likely already have in your kitchen no pressure, no perfection required.
What’s Included
A printable PDF guide over 70 pages of full color content
Covers three core preservation methods: freezing, dehydrating, curing, pickling, fermenting, and canning
Step-by-step instructions for each method, including safety tips and basic equipment
Over twenty recipes and whole meal recipes
Designed for US letter-size paper (8.5x11) for easy at-home printing
BONUS: 3 seasonal recipe sheets delivered via email after purchase when you join our mailing list
How to Use
This guide is meant to be used, not just read. Pick one method to start with such as freezing garden produce or making a simple jam and follow the instructions at your own pace.
Why It’s Useful
Preserving food helps reduce waste, save money, and build self-sufficiency. But for many beginners, it can feel overwhelming. This guide breaks it down into manageable steps and encourages you to start small, build confidence, and grow from there.
Delivery
You’ll receive an instant digital download in PDF format, ready to view on any device or print at home.
Start preserving with confidence one jar, bag, or batch at a time.
Download your guide and begin stocking your pantry with real, homemade food.
Get The Guide
If you want confidence, not just a recipe, start here. The guide covers method selection, sanitation, jar packing, altitude adjustments, storage safety, and how to rescue a batch when something goes wrong.
Disclosure
Some links on FiberMaiden are affiliate links. When you click and purchase, I may earn a small commission at no extra cost to you. I partner only with brands and tools I trust and use in my own kitchen, studio, and garden. Your support means a lot.
Why Fall Up Potting is Different
Spring seedlings have months of increasing warmth and longer days ahead of them. Fall seedlings are racing against decreasing daylight and dropping temperatures. This means your timing has to be more precise, and your technique needs to account for slower growth rates and reduced recovery time.
Fall-started seedlings also deal with different root development patterns. Cooler soil temperatures slow root growth, so plants may appear ready for larger containers before their root systems can actually support the transition. This mismatch between top growth and root development catches many gardeners off guard.
Reading the Real Signs
The typical advice about "roots showing through drainage holes" doesn't always apply to fall seedlings. Instead, look for these more reliable indicators: roots that circle the bottom of the container when you gently remove the plant, top growth that seems disproportionately large for the container size, or plants that dry out much faster than they did initially.
Fall seedlings may also show subtle signs of being pot-bound earlier than spring plants. Leaves that yellow from the bottom up, despite adequate feeding, or plants that seem to stall in growth even with proper care often indicate they need more root space.
Timing Your Moves
The key to successful fall up potting is moving seedlings before they become severely root-bound, but not so early that you shock them unnecessarily. Fall plants have less energy reserves to recover from transplant stress, so each move needs to count.
Consider your local climate when timing transplants. Seedlings need at least 4-6 weeks to establish in their new containers before hard frost hits. This means September transplants in most northern climates, or early October in milder regions.
Size Matters More in Fall
While spring seedlings can often jump from small cells to large containers successfully, fall seedlings benefit from more gradual sizing up. Moving from a 2-inch cell to a 4-inch pot, then to a 6-inch container, gives roots time to properly establish without creating excess wet soil that can lead to root rot in cooler conditions.
Oversized containers in fall create problems that don't occur in spring and summer. Excess soil holds moisture longer in cool weather, creating conditions where roots struggle and fungal problems develop.
Adjusting Your Technique
Fall up potting requires gentler handling and more careful attention to soil moisture. Use well-draining potting mix that won't stay soggy in cooler temperatures. Water thoroughly after transplanting, then allow soil to dry slightly between waterings as roots establish.
Place newly transplanted seedlings in a location that gets maximum available light. Fall's reduced daylight means every photon counts for recovery and continued growth.
Setting Realistic Expectations
Fall seedlings won't recover from transplant stress as quickly as their spring counterparts. What might take a week in April could take three weeks in September. This slower recovery is normal and doesn't indicate problems with your technique.
Some varieties simply don't transplant well in fall conditions. Cool-season crops like lettuce and spinach usually handle the transition better than warm-season plants that are already stressed by changing conditions.
The Long Game Strategy
Fall up potting is often about creating conditions for winter survival rather than immediate growth. Properly sized containers protect root systems during temperature fluctuations and provide adequate resources for slow winter growth or dormancy preparation.
Consider whether your seedlings are destined for indoor overwintering, cold frame protection, or direct outdoor planting. Each scenario requires different up potting strategies and container sizes.
The most successful fall gardeners recognize that working with shorter days and cooler temperatures requires adjusting expectations and techniques rather than fighting against seasonal realities.
Frequently Asked Questions

Get 3 Free Recipes
Exclusive seasonal recipes for email members. High value, low frequency.
Gardening Quick Guide
One page for spacing, timing, water, feeding, pests, and harvest cues. Adjust to your climate zone and frost dates.
Sun: 6–8 hr+ for fruiting crops (tomatoes, peppers, squash). Leafy greens do fine with 4–6 hr.
Soil: rich, well-drained; most veggies prefer pH 6.0–7.0 (blueberries 4.5–5.5; potatoes 5.0–6.0).
Water: aim ~1″/week total. Water deep & infrequent. Mulch 2–3″ to hold moisture.
Feeding: side-dress heavy feeders at flowering; don’t overdo nitrogen on tomatoes/peppers.
Spacing & depth (common crops)
| Crop | Spacing (in-row × between rows) | Seed depth | Notes |
|---|---|---|---|
| Tomato (transplant) | 24–36″ × 36–48″ | — | Plant deep to first leaves; stake/cage/trellis. |
| Pepper (transplant) | 18–24″ × 24–36″ | — | Plant at same depth as pot; warm soil. |
| Cucumber | 12″ trellised or 24–36″ sprawled × 36–60″ | 1″ | Trellis for airflow & space. |
| Zucchini / Summer squash | 36″ × 36–48″ | 1″ | One plant per “hill.” |
| Winter squash / Pumpkin | 48–60″ × 60–72″ | 1″ | Big vines; give room. |
| Bush beans | 4–6″ × 18–24″ | 1″ | Succession every 2–3 weeks. |
| Pole beans | 6–8″ × 30–36″ | 1″ | Provide trellis. |
| Peas | 2″ × 18–24″ | 1″ | Cool soil; trellis helps. |
| Carrots | 2″ × 12–18″ | ¼″ | Keep surface moist; thin seedlings. |
| Radish | 2″ × 12″ | ½″ | Fast—succession every 1–2 weeks. |
| Beets | 3–4″ × 12–18″ | ½″ | Thin clusters to 1–2 plants. |
| Lettuce (leaf) | 8–10″ × 12–18″ | ¼″ | Partial shade in heat. |
| Kale | 12–18″ × 18–24″ | ½″ | Harvest outer leaves. |
| Onions (sets) | 4–6″ × 12″ | 1″ | Bulbing types need long day length. |
| Garlic (cloves) | 6″ × 12″ | 2″ | Plant in fall; mulch well. |
| Potatoes | 12″ × 30–36″ | 4″ | Hill as plants grow. |
| Basil | 12″ × 18″ | ¼″ | Pinch tops to bush out. |
Rule of thumb: seed depth ≈ 2–3× the seed’s diameter; keep tiny seeds shallow and consistently moist.
Seed starting & transplant timing
- Tomatoes: start indoors 6–8 wks before last frost; transplant after nights >50°F.
- Peppers: 8–10 wks before last frost; warm soil 65–70°F.
- Brassicas (kale, cabbage): start 4–6 wks before last frost; also great for fall.
- Cucumbers/Squash/Beans: direct-sow after last frost; soil ≥60°F.
- Peas: direct-sow 4–6 wks before last frost; soil ≥40°F.
- Carrots/Beets/Radish: direct-sow 2–4 wks before last frost.
- Lettuce: sow early spring & fall; bolt-prone in heat—provide shade.
- Fall crops: count back from first frost; choose faster-maturing varieties.
Water & feeding basics
~1″/week total (rain + irrigation). Morning is best. Deep soak the root zone 1–2×/week rather than frequent sprinkles.
1″ water ≈ 0.62 gal per sq ft.
Heavy feeders (tomatoes, peppers, squash, corn): compost at planting + side-dress at flowering/fruit set.
Light feeders (beans, peas): minimal N—too much = lots of leaves, few pods.
Companion & rotation
- Good pairs: tomato + basil; carrots + onions; cucumber + dill; lettuce under taller crops.
- Flowers for pollinators: calendula, marigold, alyssum, nasturtium.
- Avoid: beans/peas with onions/garlic (can stunt). Separate potatoes from tomatoes (shared diseases).
- Rotate: don’t plant the same family in the same spot two years in a row (nightshades, brassicas, alliums, cucurbits, legumes).
Pest & problem solver (IPM)
- Identify first (look under leaves). Remove by hand where possible.
- Use barriers: row cover for brassicas; collars for cutworms; netting for birds.
- Encourage allies: lady beetles, lacewings, birds. Avoid broad-spectrum sprays.
- Last resort: targeted products (e.g., insecticidal soap for aphids; Bt for caterpillars), following labels exactly.
- Aphids: blast with water, prune, encourage lady beetles.
- Powdery mildew: improve airflow, water mornings, remove worst leaves.
- Cabbage worms: row cover early; Bt if needed.
- Blossom-end rot (tomato): uneven watering; keep moisture steady.
Harvest cues
- Tomatoes: full color & slight give; vine-ripened flavor peaks.
- Cucumbers: glossy, firm; pick before seeds harden.
- Summer squash: 6–8″ long, tender skin.
- Beans: pods filled but not bulging.
- Garlic: 30–50% of leaves browned; cure in shade.
- Onions: tops fall over & necks soften; cure before storing.
- Potatoes: harvest “new” after flowering; storage when vines die back.
Frost & season extension
© FiberMaiden • www.fibermaiden.com


